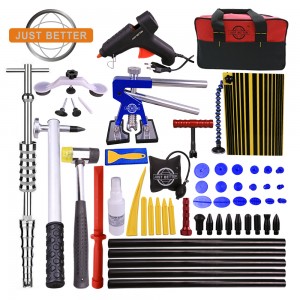
Paintless Dent Removal Tool Dent Puller Lifter Glue Hammer Tabs
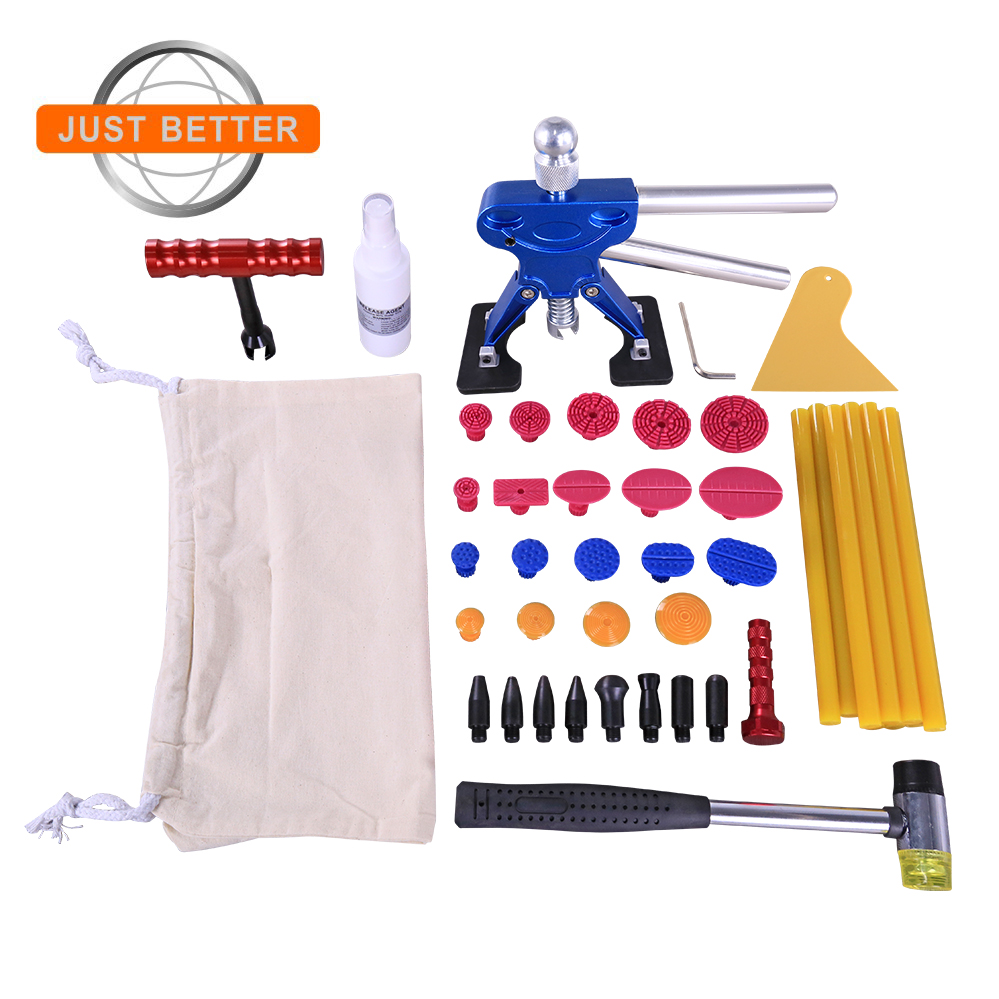


1PC Adjustable Dent Lifter(Aluminum alloy)
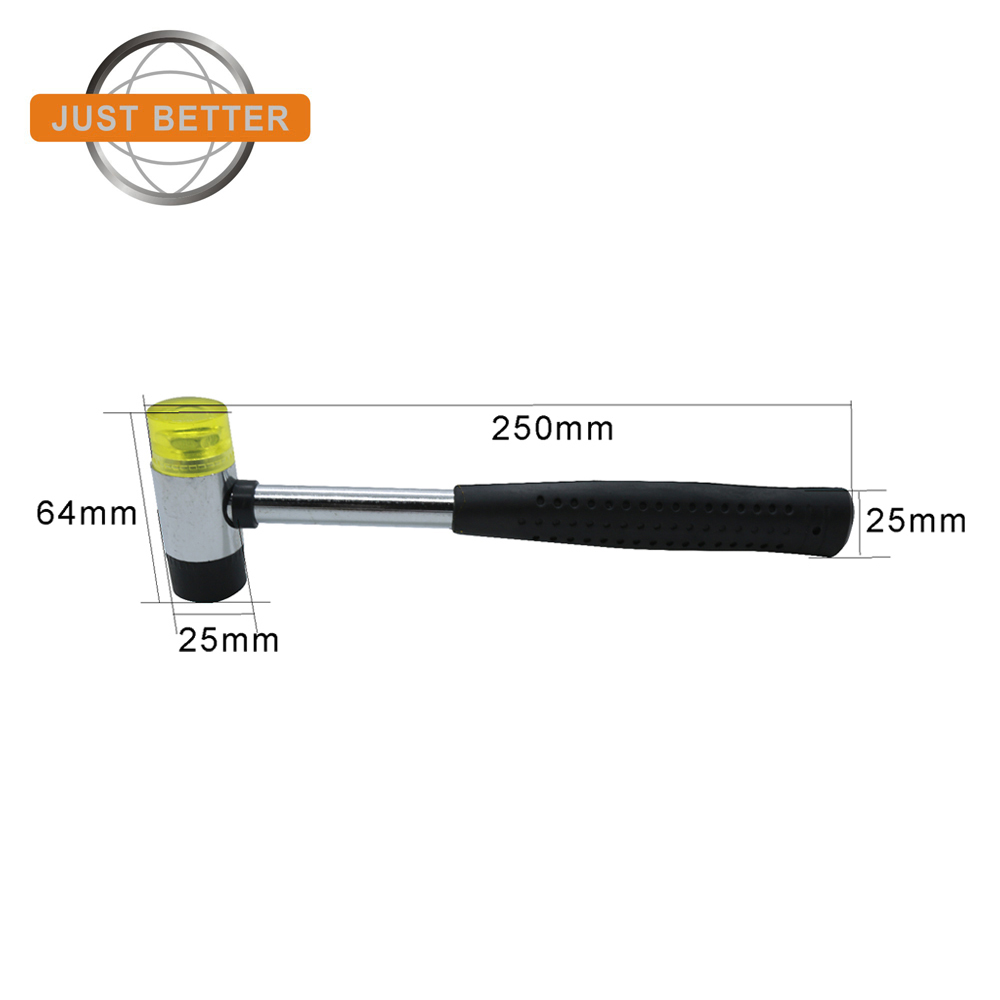
1PC 25mm Hammer
1PC Mini t Bar(Aluminum alloy)
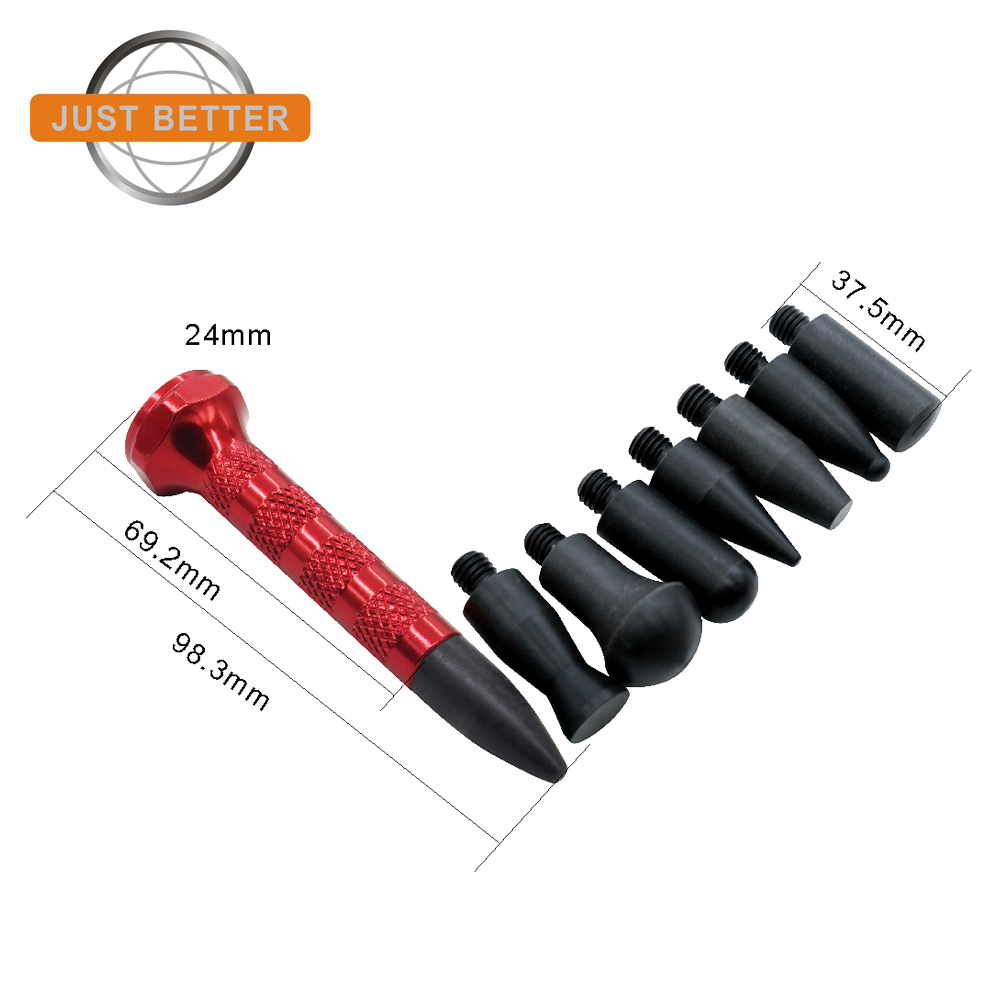
1SET Tap Down Pen with 8pcs tips(Aluminum alloy)
1PC Cotton cloth bag(35*30cm)
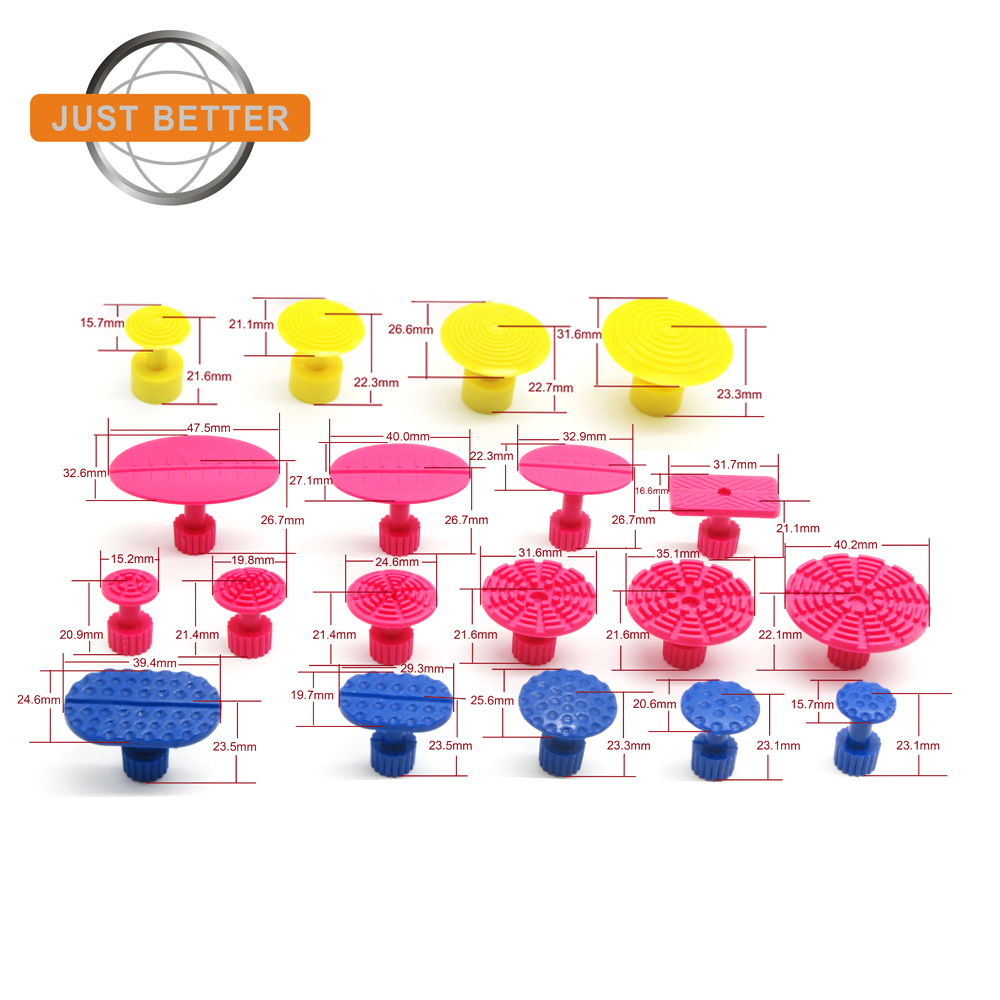
19PCS Glue Tabs(Material:PA6)
1PC Bottle(60ml)
1PC Scraper
10PCS Glue Sticks(11.2*200mm)
1.Neutral inner box + Ourter Carton.
2.According to your request
Application:Car Body Dent Repair
Function:Repair Car Dent Body
Used for:Repairing Car Body Dents
Advantages:
1.The operation is very simple, basically everyone can operate. Saving time, effort and money is the key.
2.No damage to the paint and body.
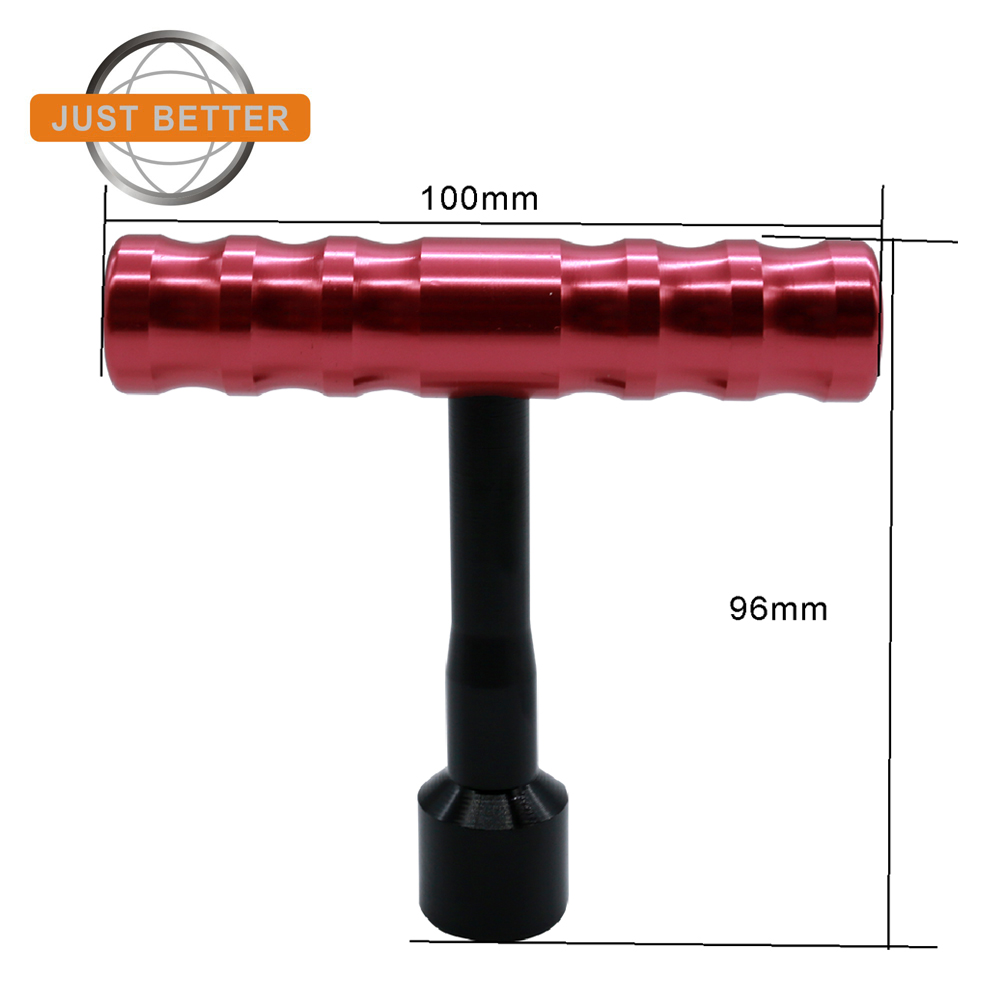
1. Degrease the part to be glued with household alcohol and the sprayer (empty) supplied in the kit ;
It is not necessary to degrease the dent repair suction cup or remove glue residue for better adhesion.
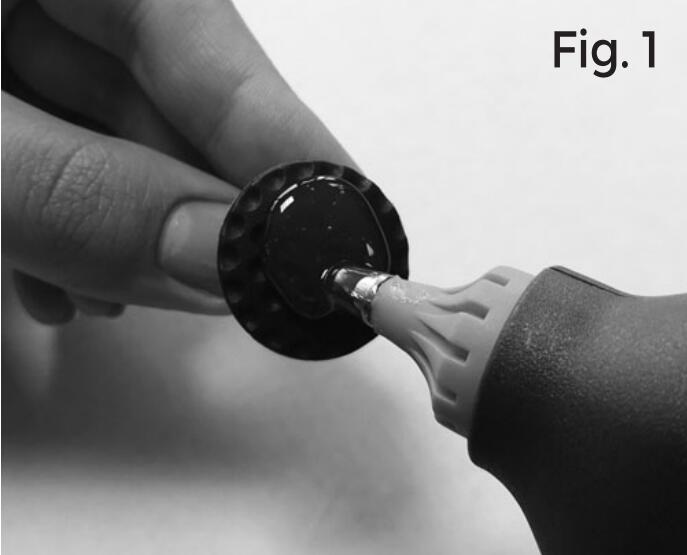
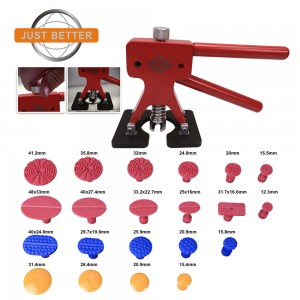
2. Choice of the dent removal suction cup and positioning of the glue on it:
- The choice of the shape and diameter of the dent removal suction cup is made depending on the shape of the impact.
- The glue must be positioned well in the centre of the dent removal suction cup, and the unit in the centre of the impact to be straightened (Figs. 1& 2).
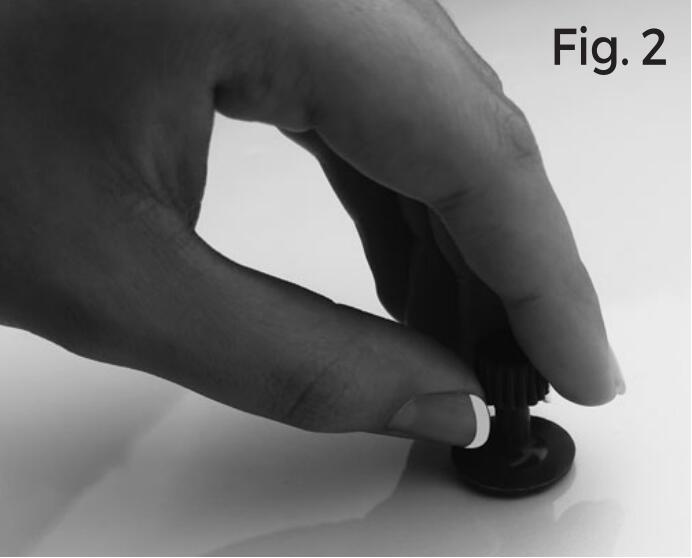
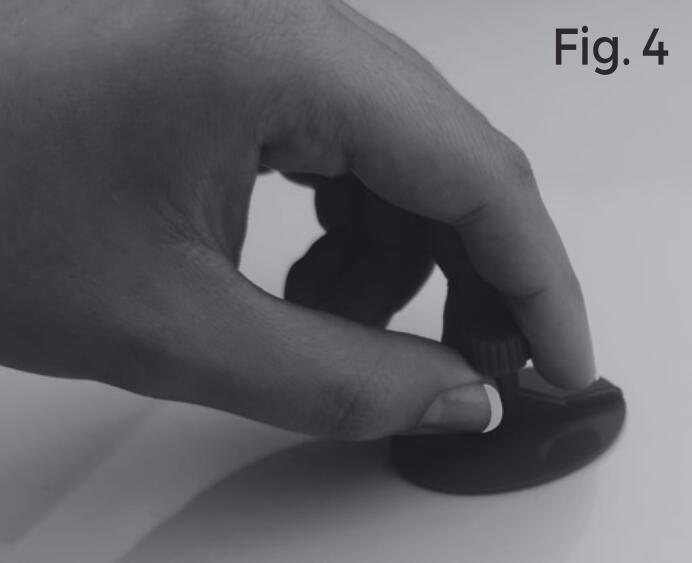
For edge impacts, use the elongated oval body suction cup (provided for this purpose), and position the glue in the centre of it, as shown in fig. 3, then glue the body suction cup as shown in fig.4
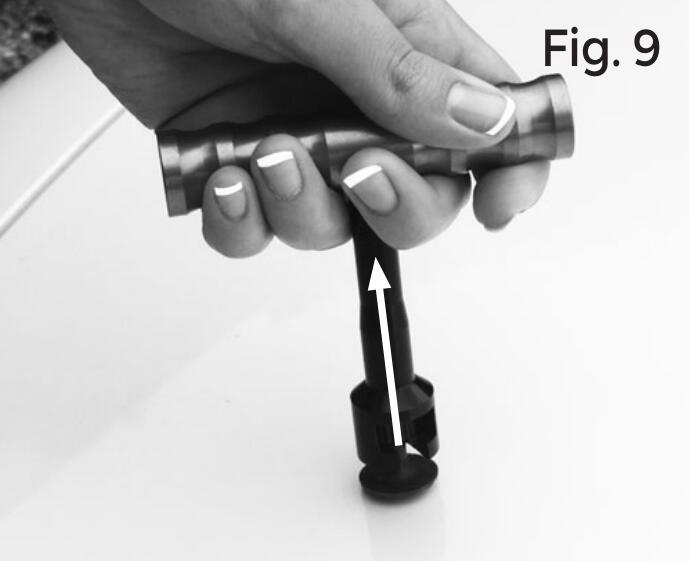
3.Allow the glue to dry for a few minutes (wait until the dent repair suction cup cools), then insert the dent pull lever (Fig. 5) or T-bar dent puller (Fig. 9) on the upper part of the dent removal suction cup and apply gentle pulses.

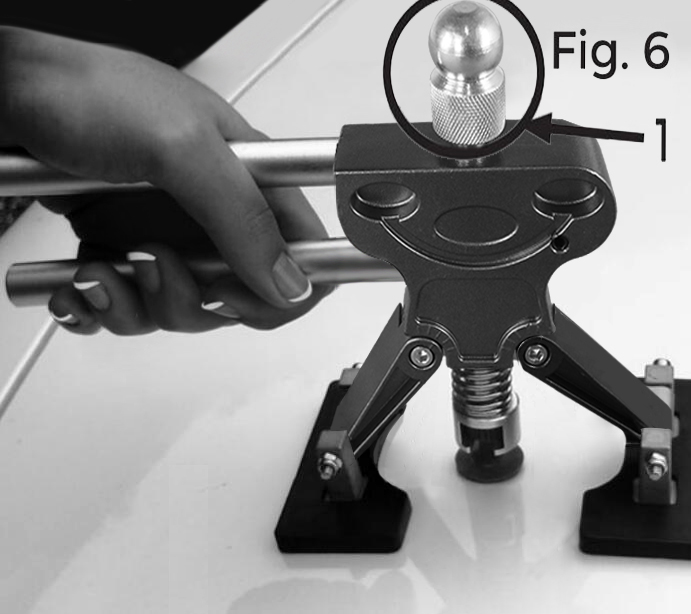
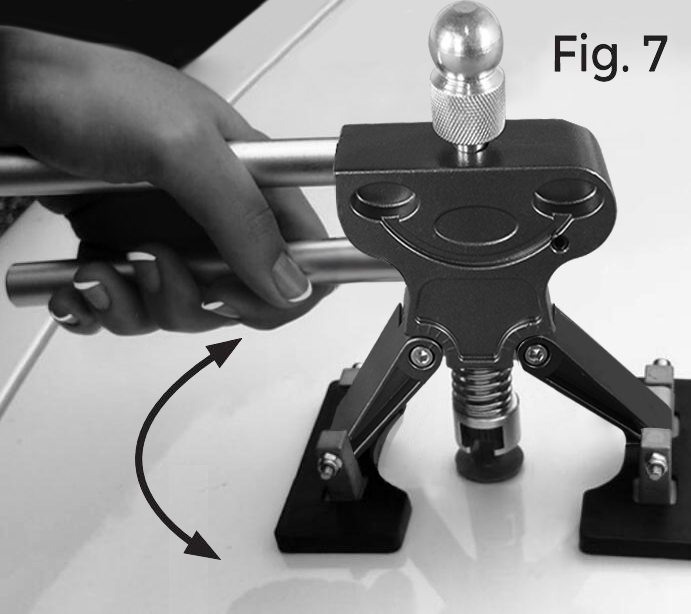
4. If the dent pull lever is used to straighten the sheet metal, it is important to adjust the stroke of the dent removal suction cup using the adjustment knob 1 located on top of the dent puller (Fig. 6). It is recommended not to stay in the same place and to turn around the impact with successive gentle pressures, in order to have different support points during the operation (Fig. 7).
VISUAL CONTROL
For the control, it is recommended to work in oblique light with the reflection of a double neon light, to assess the details of the painting.
REMOVAL OF THE DENT REPAIR SUCTION CUP
To remove the dent repair suction cups, simply pour a few drops of household alcohol between the suction cup and the sheet metal.
1. If the repaired part has a slight dent, it is recommended to use the equaliser tip holder (Fig. 8) provided in the kit.
2.To remove any remaining traces of glue, use household alcohol with the sprayer.

-
PDR kit Auto Body Paintless Dent Repair Removal...
-

Paintless Dent Repair Tools Dent Puller Kit Wit...
-
Paintless Dent Repair Tools Glue Puller Dent Re...
-

Paintless Dent Repair Rods Auto Body Paintless ...
-

Auto Paintless Dent Repair Kits Car Dent Pullin...
-

Auto Body Dent Removal Kit Vehicle Repair Tool ...